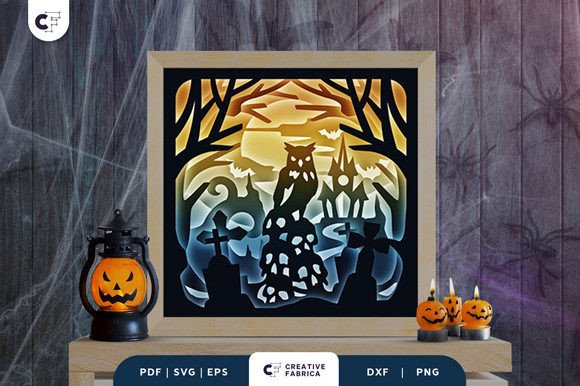
How to Create a Spooky Halloween Scene with Zombie Hand in Haunted Forest 3D SVG
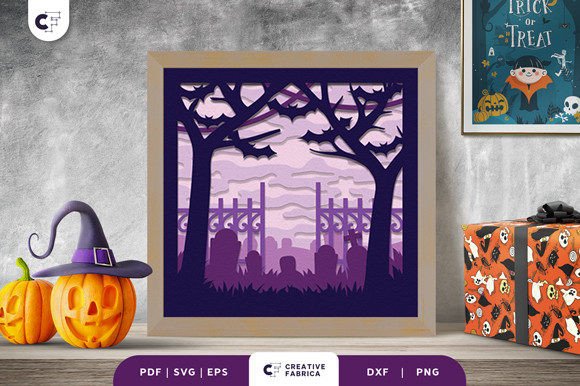
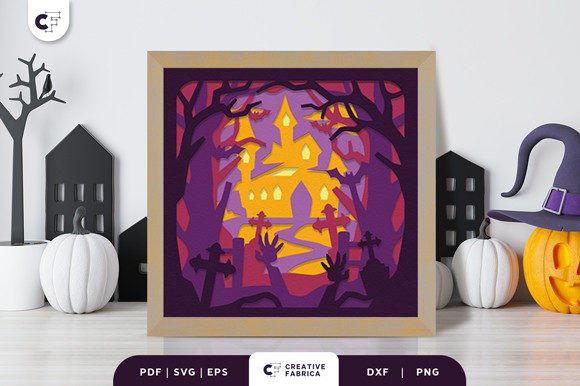
Halloween is the perfect time to get creative and bring eerie, enchanting scenes to life. One of the most popular and visually striking ways to do this is through 3D paper crafts, especially shadow boxes that add depth and dimension to your decorations. A standout design for this purpose is the Zombie Hand in Haunted Forest 3D SVG. This detailed and spooky illustration captures the essence of a haunted forest at night, complete with a sinister zombie hand, flying bats, lurking owls, and a stack of skulls beneath twisted tree silhouettes. In this guide, we’ll walk you through how to turn this digital design into a DIY Halloween decoration using simple materials and tools.
Understanding the Design: What’s Included?
The Zombie Hand in Haunted Forest 3D SVG is more than just an image—it's a layered masterpiece designed specifically for crafting. The file comes in multiple formats to suit your preferred method of cutting or printing:
- SVG – Ideal for use with cutting machines like Cricut or Silhouette.
- PDF – Great for manual tracing or printing on cardstock.
- EPS – Preferred by professionals for scalability and precision.
- PNG – Perfect for previewing the layout or sharing online.
- DXF – Compatible with laser cutters and CNC machines.
This design includes six layers, which are carefully structured to create a dramatic 3D effect when assembled. The dimensions are set to 20.32×20.32 cm, making it ideal for standard frames or custom-sized display boxes. It's important to note that while the previews showcase vibrant colors, the final product may vary slightly depending on the lighting and the paper used.
Gathering Your Supplies
Before diving into the project, ensure you have all the necessary materials on hand. Here’s what you'll need:
- Cutting machine or tools – Depending on the format you choose, you might use a Cricut, Silhouette, or even a good-quality craft knife and ruler for manual cuts.
- Cardstock – The recommended choice is Encore Cardstock 80 lb cover (216 gsm) for its durability and smooth finish. You can purchase compatible stock from the 12×12 Cardstock Shop.
- Framing options – Look for frames that can accommodate layered paper cutouts. Shadow box frames are particularly useful as they provide space between each layer for depth.
- Craft glue or 3D mounting tape – These will help you secure each layer in place without flattening the design.
- Optional embellishments – Consider adding glow-in-the-dark paint, faux moss, or small LED lights to enhance the spooky atmosphere.
Having everything ready before starting ensures a smoother process and helps maintain the quality of your finished piece.
Step-by-Step Assembly Guide
Once you’ve printed or cut out the layers, it’s time to assemble them. Follow these steps to build your haunted forest scene:
- Print or Cut Layers: If you're using a cutting machine, load the chosen design format and select the appropriate material settings for your cardstock. For manual assembly, print the PDF onto heavy cardstock and carefully trace and cut each layer.
- Organize Layers: Lay out all six layers in order. Start with the background layer, then work your way forward to the foreground elements such as the zombie hand and skulls. This step is crucial for achieving the correct visual hierarchy and depth.
- Mount Each Layer: Using 3D mounting tape or a dab of craft glue, attach each layer to the frame or backing board. Space them apart so the shadows and overlaps look natural and give the illusion of movement and depth.
- Secure Final Frame: Once all layers are in place, insert the completed panel into a shadow box frame. Make sure it fits snugly and is visible from all sides if possible.
- Add Finishing Touches: To make your Zombie Hand in Haunted Forest 3D SVG pop, consider adding texture with embossing powders or layering different colored papers for contrast. You could also incorporate small plastic skulls or artificial spiderwebs for added realism.
With patience and attention to detail, your shadow box will transform from flat pieces of paper into a hauntingly beautiful Halloween decoration.
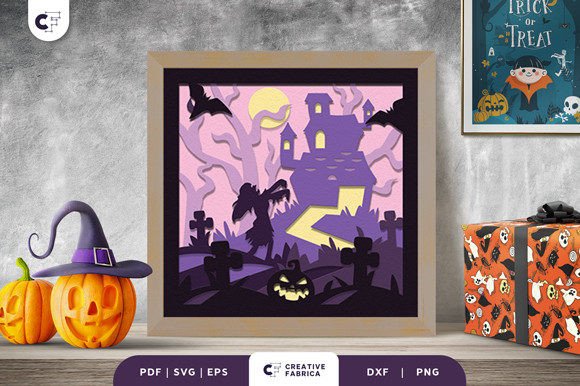
Customization and Creative Adaptations
One of the best things about the Zombie Hand in Haunted Forest 3D SVG is its versatility. While it’s tailored for Halloween, you can easily adapt the design for other occasions or themes. For example:
- Winter Wonderland: Replace the zombie hand with a ghostly snowman and rework the background to show pine trees and falling snow.
- Day of the Dead: Swap the skulls for colorful sugar skulls and add floral elements to reflect the Mexican holiday theme.
- Year-Round Decor: Use the silhouette style to create a gothic-themed room accent or seasonal horror movie poster.
You can also experiment with different color schemes. Instead of black and white, try shades of purple, green, or red to evoke a more mystical or blood-curdling vibe. Don’t be afraid to mix and match parts of the design—some layers can be reused in new configurations to keep your crafting fresh year after year.
Why Choose a 3D Paper Craft for Halloween?
Creating a Haunted Forest 3D SVG shadow box offers several practical benefits beyond its aesthetic appeal:
- Reusability: Unlike many Halloween decorations that end up in the trash, a well-made paper shadow box can be disassembled, stored, and reused every October.
- Cost-Effective: Compared to store-bought 3D Halloween displays, this DIY option uses affordable materials and can be replicated multiple times with minimal cost.
- Personalization: You control the look and feel of your design. Add personal touches or tailor it to fit your home decor or party theme.
- Eco-Friendly Option: By using recyclable cardstock and non-toxic glues, you’re creating a sustainable decoration that aligns with modern eco-conscious trends.
Additionally, the design allows for a hands-on experience that makes it great for family activities or classroom projects during the spooky season.
Tools and Techniques for Cutting Precision
Whether you're using a cutting machine or going the traditional route with scissors and rulers, precision is key to making your Zombie Hand in Haunted Forest 3D SVG look professional. Here are some tips for both methods:
Using a Digital Cutting Machine
If you have access to a Cricut or Silhouette, follow these steps for optimal results:
- Open the SVG file in your software and adjust the size if needed.
- Select the type of blade required for your cardstock thickness.
- Load the cardstock into the machine, ensuring it’s properly aligned.
- Press “Go” and let the machine handle the intricate cuts. Double-check each layer afterward for accuracy.
Always test the design on scrap paper first to confirm the settings are correct and avoid wasting materials.
Manual Cutting Tips
If you prefer to cut by hand, take it slow and steady:
- Use a fine-tipped marker to trace the outlines clearly onto your cardstock.
- Cut along the lines with a hobby knife and metal ruler for straight edges.
- For curved or detailed shapes, use small snips and gradually shape the cutout.
- Consider wearing a magnifying visor for better visibility, especially with tiny details like bat wings or skull textures.
Practice on simpler designs before tackling the full haunted forest scene to improve your technique and confidence.
Display Options and Placement Ideas
Now that your Zombie Hand in Haunted Forest 3D SVG is complete, where should you put it? Think creatively about how to showcase your handmade decoration:
- On a Wall: Mount the shadow box behind a window or hallway wall for a dramatic effect, especially under dim lighting or moonlight.
- As a Centerpiece: Place it on a mantel or coffee table alongside candles, pumpkins, and other Halloween items to create a cohesive display.
- In a Gallery Setting: Group several similar 3D paper crafts together for a themed art gallery look in your living room or entryway.
- As a Gift: Wrap the finished shadow box in tissue paper and present it as a unique handmade gift for friends or family who love Halloween.
Shadow boxes don't have to be static—they can become part of an evolving Halloween display. You can rotate the layers or replace certain elements based on the mood you want to create.
Common Factors to Consider Before Starting
Before you begin your Haunted Forest 3D SVG project, there are a few considerations that can impact the final result:
- Time Investment: Assembling a 6-layer shadow box can take anywhere from 1 to 3 hours, depending on your skill level and the complexity of the cuts.
- Space Constraints: Ensure you have enough room to lay out and work with all the layers without overcrowding your workspace.
- Lighting Conditions: Test your design under the lighting conditions where it will be displayed to see how shadows interact with light sources.
- Storage Needs: If you plan to reuse the shadow box next year, invest in a sturdy container or acid-free folders to protect the delicate layers.
Also, consider the audience. If you're making it for kids, simplify the design or remove any overly scary elements. For adults, you can embrace the full horror aesthetic and even add sound effects or motion sensors to enhance the experience.
Conclusion
Bringing the Zombie Hand in Haunted Forest 3D SVG to life is a rewarding project that combines creativity, craftsmanship, and a touch of spookiness. Whether you're an experienced crafter or just getting started, this design provides an excellent opportunity to explore 3D paper art. With the right tools and techniques, you can create a reusable, customizable decoration that stands out from the usual Halloween clutter. So grab your cutting machine, cardstock, and imagination, and start building your own haunted masterpiece today.