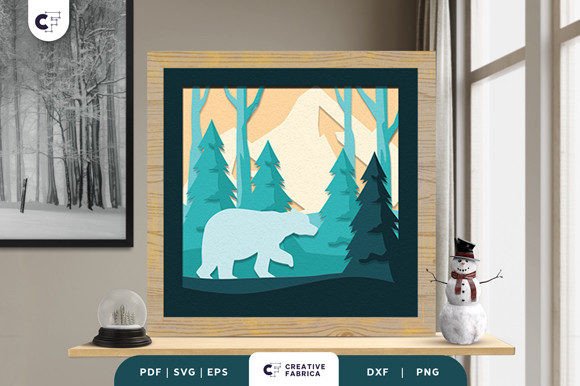
Bear Winter Forest 3D Shadow Box SVG – A Beautiful Addition to Your Creative Projects
The Bear Winter Forest 3D Shadow Box SVG is a stunning digital design that brings the serene beauty of a snowy forest and a majestic bear right into your home. Perfect for those who love nature, winter scenes, or are looking to add a unique artistic touch to their space, this shadow box combines intricate details with easy-to-use formats. Whether you're an experienced crafter or just starting out, it's important to understand how to choose, use, and apply these designs correctly to ensure the best results.
What Is the Bear Winter Forest 3D Shadow Box SVG?
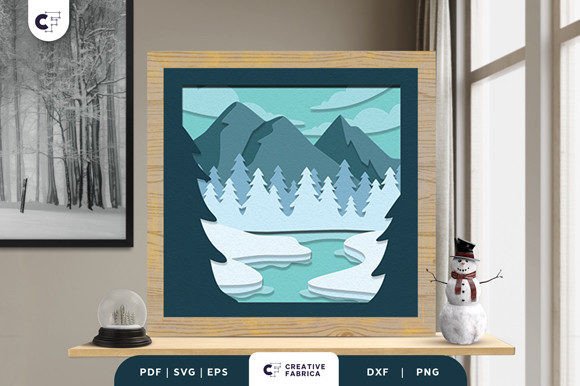
This digital file features an 8-layered design of a bear standing in a pine forest during winter. The layers can be printed, cut, and assembled using a cutting machine like Cricut or Silhouette. Once constructed, the piece has a three-dimensional effect, making it look almost lifelike when displayed. It’s ideal for wall art, framed decorations, or even as part of holiday displays.
Available in multiple formats including SVG, PDF, EPS, PNG, and DXF, this design is versatile and works well across different platforms and software. The size is 20.32×20.32 cm, which fits neatly into most frames and makes it suitable for both large and small spaces.
Common Mistakes When Choosing and Using Bear Winter Forest 3D Shadow Box SVG
One of the biggest mistakes people make when purchasing this type of design is not verifying compatibility with their cutting machine. While SVG files are widely supported, some machines may require specific settings or software versions. Always double-check the format requirements of your machine before downloading any digital design.
Another common oversight is underestimating the importance of high-quality cardstock. The Bear Winter Forest 3D Shadow Box SVG looks its best when printed on thick, durable paper such as Encore Cardstock 80 lb cover (216 gsm). Using thinner or lower-quality stock can lead to curling, tearing, or a less professional finish.
Ignoring Layer Order and Assembly Tips
Shadow boxes rely heavily on the correct layer order for depth and realism. Failing to arrange the layers properly after cutting can ruin the visual impact of the final piece. For example, if the bear is placed behind the trees instead of in front, the scene will appear flat and confusing. Always follow the recommended assembly sequence provided by the designer or in accompanying instructions.
Misusing Adhesives for 3D Construction
Using regular glue or tape for 3D shadow boxes can lead to misalignment and poor durability. Instead, opt for foam double-sided adhesive to give each layer the necessary lift and stability. This ensures that the bear stands proudly in the snow-covered forest and that the entire piece holds together over time.
How These Mistakes Can Impact Your Results
If you skip the step of checking machine compatibility, you might end up with a file that doesn’t work at all — or worse, one that cuts incorrectly and wastes materials. Similarly, using the wrong adhesives can cause your finished shadow box to sag or collapse, especially if you plan to display it long-term.
Color discrepancies due to lighting sources or paper types can also affect the final presentation. The preview images show the vibrant colors and textures of the design, but actual results may vary slightly depending on the material used and ambient lighting. This is why it's wise to consider the surface and environment where the shadow box will be displayed.
Practical Advice for Better Outcomes
To avoid compatibility issues, always confirm whether your cutting machine supports SVG files or if you need to convert them to another format first. If unsure, reach out to the seller or consult the user manual for your device. Some machines also have built-in libraries or apps that simplify the process.
When printing, choose a high-quality cardstock like the Encore Cardstock 80 lb cover 216 gsm, which provides excellent rigidity and color retention. This helps maintain the crisp lines and vivid colors of the Bear Winter Forest 3D Shadow Box SVG.
Follow the suggested layer order and take time to assemble the pieces carefully. Using a ruler and tweezers can help align each section precisely. Adding optional LED lights beneath the frame can enhance the effect, giving the illusion of glowing snow and creating a cozy ambiance.
Realistic Examples and Better Approaches
Imagine you’ve just downloaded the Bear Winter Forest 3D Shadow Box SVG and excitedly start cutting it on your Silhouette Cameo. However, you notice the bear isn’t appearing correctly. You quickly realize that you forgot to check if your version of Silhouette Studio supports the latest SVG format. To fix this, convert the file to a compatible format like DXF or use a newer version of the software.
Alternatively, suppose you’re assembling the shadow box and find that the layers aren’t sticking well. Switching to foam adhesive instantly improves the structure and adds the much-needed dimensionality. The result is a more realistic and visually appealing scene that feels like it was captured from a real forest.
What to Check Before Making a Decision or Starting Your Project
- Machine Compatibility: Ensure your cutting machine supports the file formats included (SVG, DXF, etc.).
- Paper Quality: Look for 80 lb or heavier cardstock to prevent warping and maintain detail.
- Layer Instructions: Read through the assembly guide to understand the correct order and positioning of each element.
- Lighting Conditions: Consider how the shadow box will be lit in its final location to manage expectations about color accuracy.
- Optional Enhancements: Decide if you want to include LED lights or a decorative frame to elevate the overall look.
Why Choose Bear Winter Forest 3D Shadow Box SVG?
For many creators, the appeal of Bear Winter Forest 3D Shadow Box SVG lies in its blend of simplicity and elegance. It allows for customization — you can paint the pieces, add glitter to the snow, or incorporate other elements like faux fur for the bear. This flexibility makes it a favorite among hobbyists, educators, entrepreneurs, and bloggers who want to create something unique yet accessible.
Additionally, since the design is available in multiple formats, it's easy to integrate into various projects. You could turn it into a greeting card, a seasonal banner, or even a backdrop for a photography shoot. The possibilities are endless once you understand how to work with the layers and materials effectively.
Final Thoughts
The Bear Winter Forest 3D Shadow Box SVG is a fantastic way to bring the magic of winter indoors. But like any creative project, success depends on attention to detail and preparation. Avoid common pitfalls by confirming machine compatibility, selecting the right materials, and following the proper assembly techniques. With these steps, you’ll create a beautiful, lasting piece of art that captures the essence of a peaceful winter forest with a bear watching over it.
Get yours today and enjoy the satisfaction of crafting something truly special — from the comfort of your own home.